
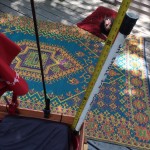
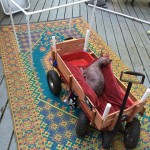
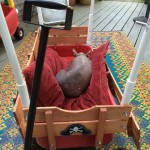
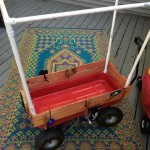
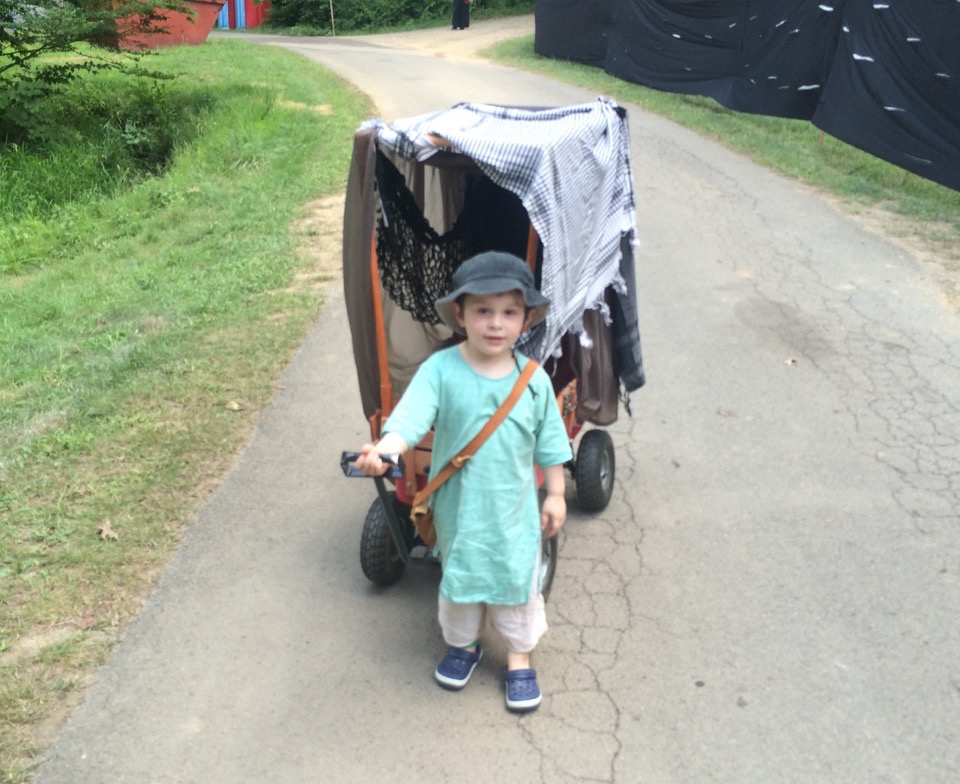
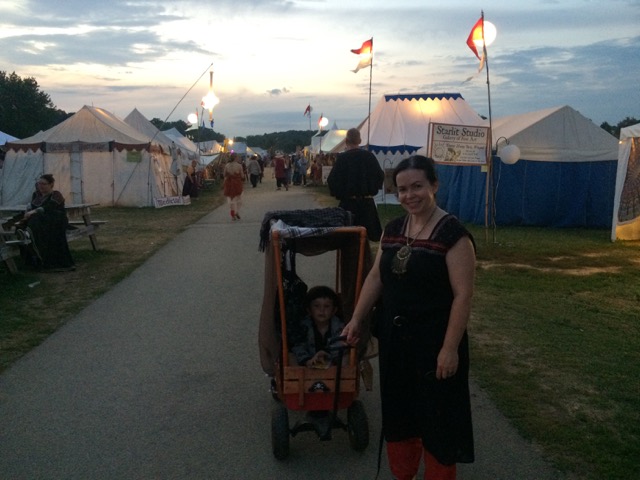
Captain Sputnik’s Carney Barnacle turned into Lord Wolfhart’s Pimped-Out Pennsic Ride
Because why would you roll with a plain Radio Flyer when you could rock with a pimped out DIY medieval wagon canopy?
The SCA scene has a reputation for some serious DIY mods, whether help encourage a more authentic medieval experience or to turn your camping into glamping. Carving out a niche for the next gen of SCAdians, there’s no shortage of Pintrest pins and Facebook groups dedicated to accessorizing your Middle Ages minor. And that extends to transportation.
Total cost of materials (minus tools): Under $20. Having never before purchased PVC pipe, I was shocked how inexpensive it is. We purchased ours from a big box home improvement store in 10-foot lengths for about $1.50 each.
What you need:
- ~36″ of 3/4″ PVC pipe (to be cut into four 9″ lengths)*
- ~202″ of 1/2″ PVC pipe (cut to various lengths; see below)*
- 4 PVC caps
- 4 PVC 3-way joints (could only find with one end threaded, so had to get 4 threaded-to-non-threaded couplers)
- 24 washers
- 8 bolts (wanted 1.75″ long but found only 1.5″ and 2″, so had to opt for 2″)
- 8 nuts
- 8 rubber caps
- rubber mallet (worth the investment; we can’t tell you how many uses we’ve found for this!)
- wrench
- file
- tape measure
- permanent marker
- power drill with various drill bits and screw heads (or a screw driver)
- vice
- saw
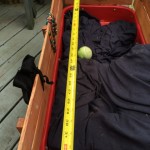
*Measure your wagon. That will determine how wide and long to cut the pipe. The height is entirely your own preference. You want it to be tall enough for your child to sit comfortably and easily enter and exit, but not so tall that it becomes awkward and wobbles too much when on the go. Consider also the additional length that the joints will provide. Your pipe lengths can exceed your wagon dimensions by an inch or two. This will produce a taper towards the bottom, i.e. wider in the headspace. In the photos below I coincidentally used a length of PVC pipe that I already had lying about to assist with measuring.
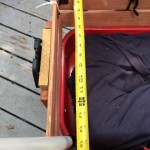
My final pipe lengths:
- x4 9-inch lengths of 3/4″ pipe
- x4 26-inch lengths of 1/2″ pipe for canopy height
- x2 33-inch lengths of 1/2″ pipe for canopy length
- x2 16-inch lengths of 1/2″ pipe for canopy width
How to cut PVC:
I used a circle saw. It was messy. Shredded PVC flecks will get everywhere, but they brush up easily. It would be smart to hold the pipe with a vice. See also 3 Ways to Cut PVC Pipe – wikiHow.
For the Draw Bridge:
- 3 small hinges
- 2 gate latches (wishful thinking; right now we use bungees cords)
- saw
- screw driver
This was a prior modification, which isn’t detailed in this post. Hopefully it’s pretty straight-forward from the photos.
Step 1
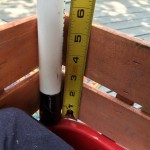
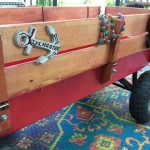
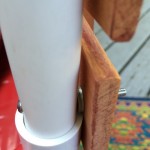
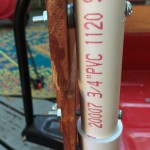
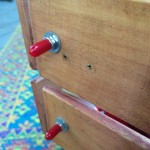
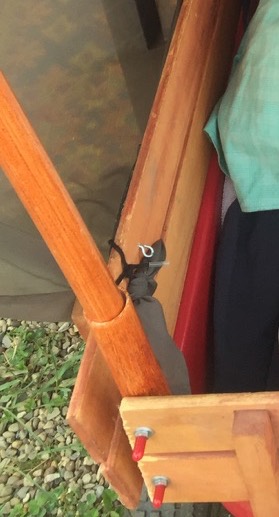
Cut the 3/4″ PVC pipe into four 9″ lengths. These will be permanently bolted to the wagon walls to serve as the holsters for easily inserting and removing the canopy.
Use the tape measure and marker to apply a dot at each cut line. If you prefer, you could use the file to score the pipe at the cut line instead. Before marking the pipe, do the math! My pipe came in 10-foot (120″) lengths. (Measure it, because it was actually 120.5″)
Step 2
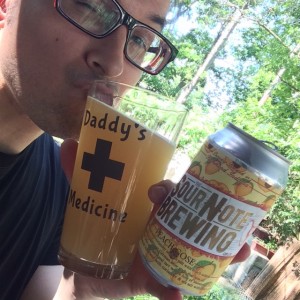 Now that you’re done with the dangerous power tools, you can open a beer or pour yourself a horn of mead. My choice was 18th Street Brewery’s Sour Note Peach Ghose. It goes well with Iron Maiden.
Optional: If any lengths of pipe were accidentally cut a bit too long, you may wish to file them down so all lengths are uniform. Small discrepancies like 1/8″ won’t make much of a noticeable difference in the end.
File at least one end on each of the four lengths of 3/4″ “holster” pipe, since these ends will be permanently exposed even when the canopy is not in place (unless you come up with some sort of clever capping solution).
Step 3
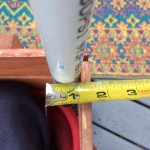
Drill small holes through the flat surface of each of the caps to permit rain water razzleberry juicy juice to drain. Then use the rubber mallet to pound the caps onto the bottom ends of each 9″ holster.
Step 4
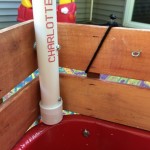
Size up the holster pipes to the four corners of your wagon. Use the marker to place dots where you want to attach the holsters to the wooden railings using bolts. In my experience, each corner was slightly different, so the bolt holes were not uniformly distributed on each pipe. You’ll want to drill two holes on each pipe for greater stability.
Step 5
Drill holes through your marks on the pipe. Drill all the way through the pipe, both sides. Tip: I drilled the lower hole first all the way through, then the upper hole on only one side. I then aligned the pipe to the wooden wagon railing, then drilled through the railing at the lower hole while holding the pipe in place. Then I bolted the pipe to the railing (only finger-tight) and drilled the other side of the pipe’s upper hole and through the wooden railing, just to be sure everything lined up.
Step 6
After having drilled all holes through the pipe holsters and wooden railings of your wagon, attach the holsters with bolts and washers using the wrench and screw driver. I put washers on both sides of the wooden railings. I used 3 washers per bolt, putting 2 washers between the pipe and railing due to the width of the PVC cap on the bottom. Don’t over tighten. You don’t want to warp your pipes!
Step 7
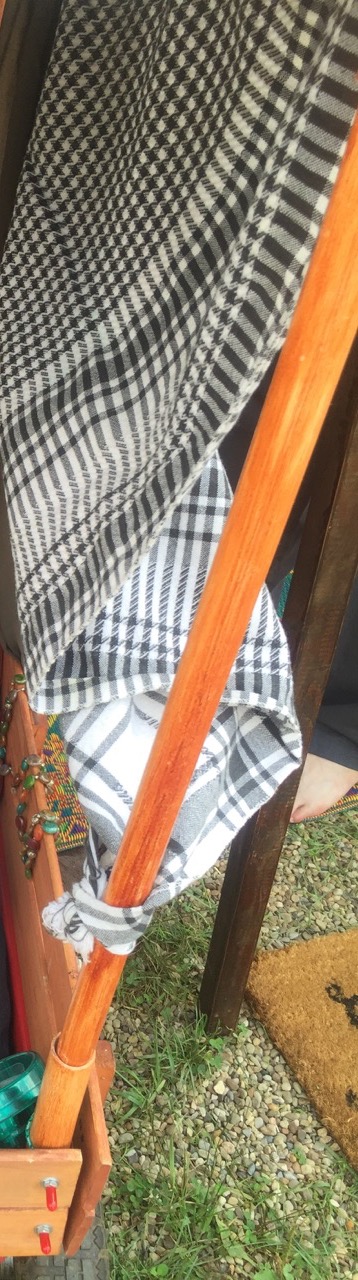
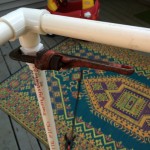 Assemble the canopy. You’ll need the rubber mallet to fully join the pipes to the 3-way. Use the wrench to screw on the threaded couplers. Some threading of the coupler may remain visible. I could not fully tighten it even with a wrench.
Step 8
 Cut rubber caps to appropriate length and apply.
Fahrvergnügen! You’re done. Paint, drape, and decorate however you see fit. Have fun storming the castle!
Carney Barnacle Expansion Pack!
How to make PVC look like wood.
Paint job with a standard wood stain looks great! Use 100-grit sand paper to get rid of any printed markings on the pipe. Then give is a quick, heavy scouring with 60-grit. Then a nice smoothing with 100-grit. Apply stain and let it dry thoroughly for 24 hours.
Um … Oops! Lesson Learned
We left the wagon outside our tent covered with a clear plastic tarp to protect it from inclement weather. The next day, it looked like this. Our best guess is that the sunshine and tarp created an inferno and warped the pipe. I guess we didn’t get high-temperature-resistant pipe. Also, perhaps best not to store under a tarp in direct sunlight. Well, we have plenty of pipe left and it’s easy enough to replace the warped section.
Update (6/2017):
Some new 1/2″ 3-way elbow joints and a new length of pvc and we’re back in game! Found these on Amazon:
FORMUFIT F0123WE-WH-10 3-Way Elbow PVC Fitting, Furniture Grade, 1/2″ Size, White (Pack of 10)